Growing Up With An Original Hipster

Cheap people have the best ideas.  Just ask my mom.  She’s been cheap before it was cool to be cheap.  The cool kids call it “Going Green” now.  But if you were to tell my mom that she was going green, she’d probably think that she had gangrene.

Hand her a plastic bag with a scallion bunch, held together by a rubber band, and she’s in her element.  First, she’ll cut the roots off of each stalk and replant those in her garden. Once cut, she’ll toss the remaining leafy section of the scallions into a pot.  Rubber bands will go into a bag full of others that she’s collected since the Nixon days.  They’re so old, they snap in half when you tug on them.  I think she’s secretly planning on using them to build some sort of rubber band bomb shelter, in the event of a third world war.  And then the plastic bag is used to hold all of the extra money she’s been saving.

She jangles this bag from time to time when she thinks her spendthrift children are exhibiting extravagant spending behavior.  Like buying bottled water and not repurposing the plastic as a planter.  Or not collecting rainwater, to use as irrigation.  Can’t finish your rice?  Use it as an adhesive.  I used to have a pen pal in Africa who received letters from me, sent in homemade envelopes held together by leftover rice.  Some people guilt-trip their children into finishing their meals because there are “starving children in Africa”.  I literally sent my leftovers to Africa.

For most of my childhood, we kept pet chickens.  Well, they were pets until they would inevitably become “missing”.  These suspicious disappearances would often coincide with my mom cheerfully announcing to the family that the “chicken soup is ready!”  This usually happened a few hours after we had called off the search for the missing fowl.  As a child, I often thought that there was a chicknapper in the neighborhood with a voracious appetite for poultry dishes.  It worried me that someone like that was on the loose, and I thought it was my civic responsibility to bring this to the public’s attention.  Instead of posting up pictures of our missing chickens on the side of milk cartons, I suggested to my mom that we have chicken nugget boxes printed with a colored photo of our missing fowl friend, to alert the neighborhood.  She just laughed and told me to finish my chicken soup cause, unlike rice, it’s no good as an adhesive alternative.

Having a pet chicken is only fun in theory.  They poop.  A lot.  They poop while running away from you.  They poop while they eat.  They poop while you’re petting them.  And you can only pet them in one direction, if you want to avoid ruffling their feathers.  Then you feel guilty when you crave chicken nuggets after playing with them.

Besides, no matter how good your pet chicken is, it will always run away from you.  Nothing is more traumatizing than being thirteen years of age, and running down a busy road, trying to unsuccessfully lure your pet chicken home, with a limp piece of lettuce. To make matters worse, our house was near several schools, so if it was during peak traffic hours, your chicken run performance was guaranteed to have a fellow classmate in the audience.  If you’re wondering, chickens don’t respond to its name or commands.  It’s not like searching for a dog and all you have to say is “Hello Pet Dog, are you hungry?  Please come to me if you are.”  Chickens aren’t stupid but they are technically birdbrained.  To catch a chicken on the lam, all you can do is hope that it’ll run into a wall or wide pole so that you can swoop in and carry it home, underneath your shirt.

Fast forward to a year ago.  During a visit to Portland, I came across a booth advertising “urban homesteading” services to the general public.  This phrase was new to me but when I read the bullet points of what constitutes urban homesteading e.g. edible landscaping, pickling, raising farm animals; it was like reading an exalted description of my childhood.

I picked up the phone and called my mom.  “Mom!  Remember how I used to complain about gathering chicken shit to use as fertilizer?  How, every time I drop off the dog with you, I’m a bit surprised that you haven’t attached a yoke and plow to her back and implemented her as a beast of burden?  I take it all back.  You’re cooler than 95% of America now.  The word to describe you is ‘hipster’ and you being cheap is called “urban homesteading’”.  There was a bit of silence on the phone and she finally replied, “You’re speaking with too many English words, I couldn’t understand a word you said.  Are you trying to tell me that I need my hips replaced?”  Oh mom, you’re so cool, you don’t even know it.  And that’s what every hipster strives to be.  That, and have good hair.

So, it probably comes as no surprise that I chose to forage and thrift my way into making bridesmaids gifts.  I even added chicken wire as a sort of tribute to all of my past chicken friends/dinners.  Here’s how I made everything:

Step 1:  Walk outside.  Collect some rocks.  Walk back inside and take a nap.  You’ll need it for your Goodwill trip, later in the day.  I think Goodwill is one of the rare places where you routinely hear, over the intercom, “Will the parents of the two year old, who’s currently filling his basket with toys, please come and claim him before CPS does?”  But that’s where I found the lace (99 cents apiece), blueish grey teacups ($1.99 each) and blank cards + envelopes ($1.99).  I then stopped by Jo-Ann Fabric to see what else I could find. I left with these chicken wire boxes, which were $3 each, after being marked down at 70% off.  I don’t remember how much the scrapbooking paper was but it was probably under 70 cents apiece.

IMG_4477

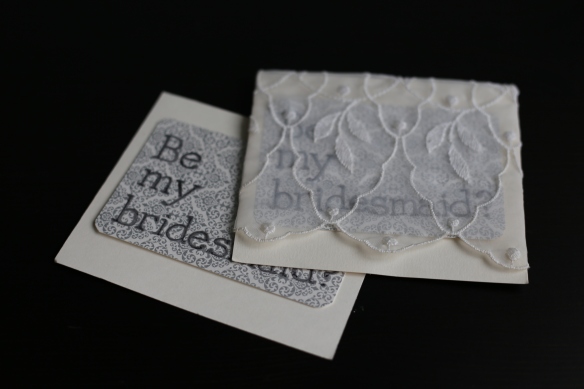
Step 2:  Cut out the scrapbook paper in fancy shapes and glue it onto the blank cards. Write on top of it, let it dry and glue on the lace fabric.  You’ll probably mess up a few times.  I sure did.

IMG_4482

Step 3:  Paint the copper colored chicken wire box with off white paint.  I deliberately left some areas “distressed” to make it look like as if it had been pecked at by a bunch of hungry chickens.  Then, line the box, with the rest of the scrapbook paper, to give it that “sophisticated henpecked” look.

IMG_4499

Step 4:  While the box dries off, tear out some pages from a book and glue it onto the insides of the envelopes.  I used a book that was falling apart, but you can use whatever book you’re not reading.  Just scan the page before glueing it on.  You don’t want to be sending your grandma steamy scenes from a grocery aisle novel.  Unless she was the one who gave you the book in the first place.  While the glue dries, I took embroidering thread and sewed on a border to my cards.

IMG_4505

IMG_4567

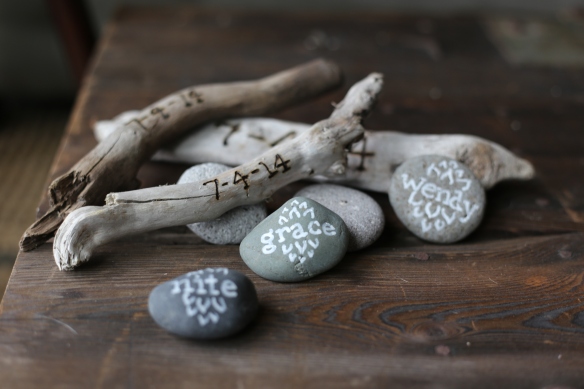
Step 5:  Put on some pants and go back outside to collect some branches.  I got these off of the beach.  Then I burned the wedding date into each piece.  I also wrote the names of each bridesmaid with white ink because nothing impresses people more than their names written on random objects.

IMG_4514

Step 6:  Cut out a piece of sponge and glue it onto the bottom of each teacup.  You’ll want to make sure that the sponge is dry and the teacup is clean, when you adhere the two together.

IMG_4516

Step 7:  There’s a lot of moss in Seattle.  It grows everywhere.  Roof tops, abandoned cars, sidewalk cracks.  So, I gathered some while on a walk with the dog.  It was growing on the sidewalk.  I thought about sending a bill for “moss removal services” to the CIty of Seattle but that requires too much effort.  But use whatever is abundant, around you.

IMG_4525

Step 8:  Water the moss and fashion some tags out of the scrapbook paper you’ve been cutting off of.  I wrote down the city where the wedding will take place at.

IMG_4528

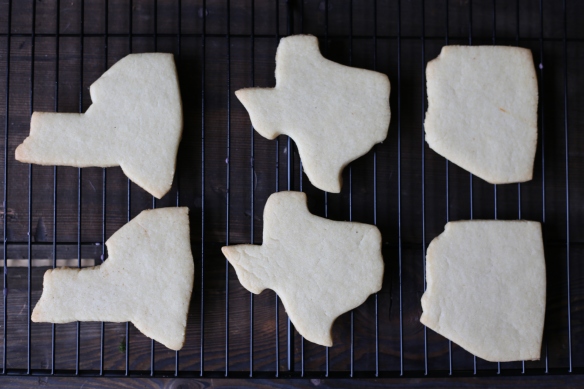
Step 9:  Add something sweet.  I baked some sugar cookies.  Then I ate half.  But six remained.  Oh, I cut them out in the shapes of each bridesmaids’ state of residence.  For some reason, I had a Texas shaped cookie cutter.  For Arizona and New York, I cut the shapes out, freehand.  The first picture is unfrosted and the second is frosted, even though you can barely tell.  I would’ve re-frosted them in a darker color but after eating a dozen of them, it kind of grew on me. So I left them, as is.

IMG_4592IMG_4594

Finished!
IMG_4618

5 Days, $500, 248 sf NYC Apt…Go!: Day 3

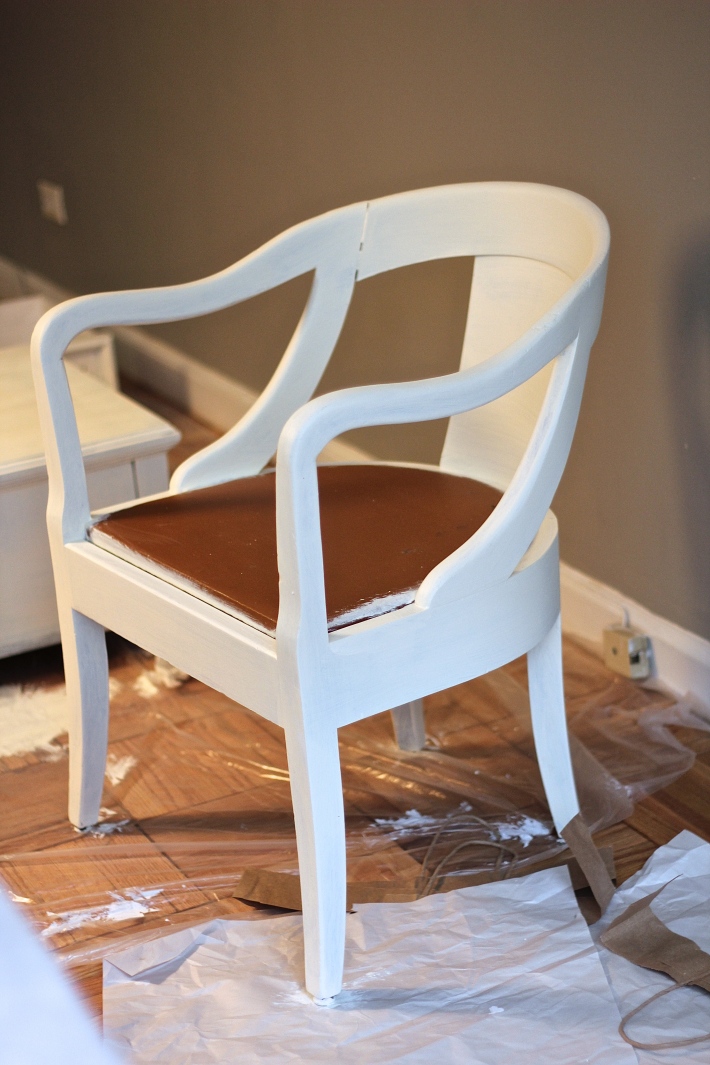
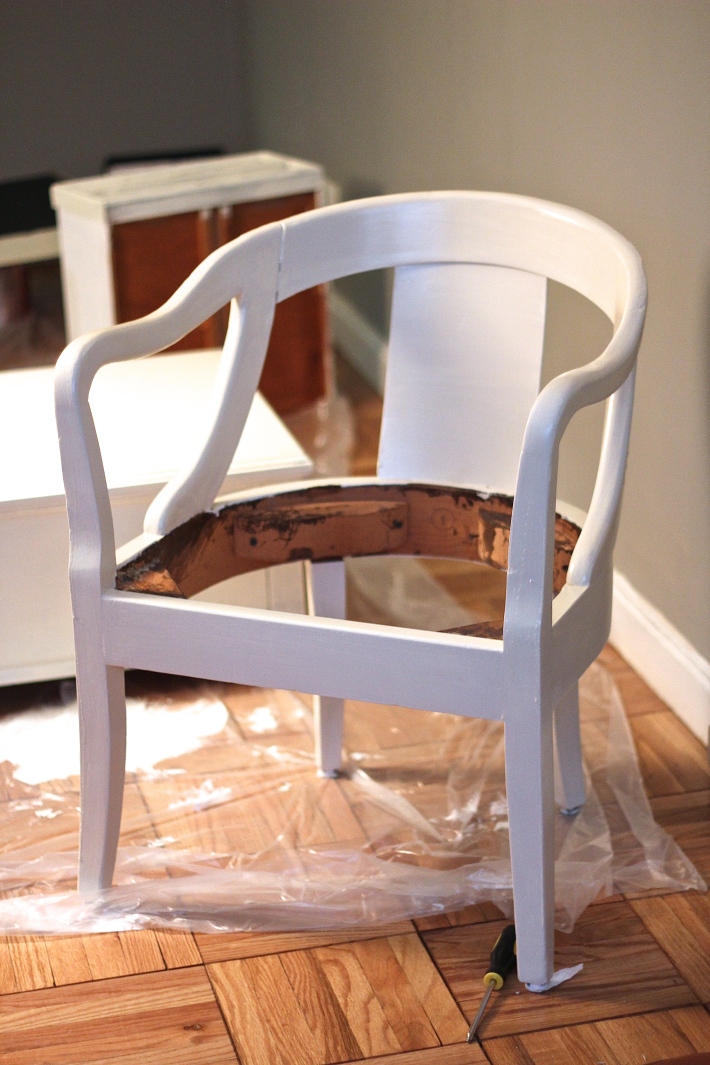
Day 3 turned out to be a pretty routine day for me.  One minute, I’m trying to decide between clotted cream or lemon curd to spread on my scone (I ended up doing both) during high tea at The Crosby in Soho.  And the next?  I’m dumpster diving.  In my heels. Okay, maybe I’m exaggerating a bit since there was no actual dumpster involved.  Here’s the story: My sister and I were walking along 3rd Avenue when I spotted a pile of discarded furniture outside of Vintage Thrift, so we crossed the street to have a look. Nothing was really worth lugging home, except for this chair.  Absolutely love the lines of this piece.  It just needed a few coats of paint and someone to get rid of that awful pleather cushion cover.  So, we picked it up and dragged it home.

Image

Once we got back, I noticed that there was a slight separation between two of the joints in the chair.  To fix this, I dabbed a little wood glue to either end, pressed down and held it in place with a makeshift clamp.  It was, by no means a fancy contraption.  I just used a very heavy textbook and the laws of gravity to hold the joints together.  Once that was done, I sanded down the entire chair and wiped it down with a damp cloth.  Next, came primer…or if you’re too lazy to go buy primer like myself, I just did a base layer of any old white paint lying around.  Same thing, if your finish paint is light in color.  I think.  Don’t quote me on that one.

Image

After the chair was dry from the first layer of paint, I figured I should remove the wooden seat bottom before giving it any more paint.  You’ll probably want to do this earlier but it really doesn’t matter too much if you’re planning on reupholstering the whole lot like I did. This is the chair after a coat of Behr paint in “Antique White” and a coat of that “Crystal Clear” polyurethane.

Image

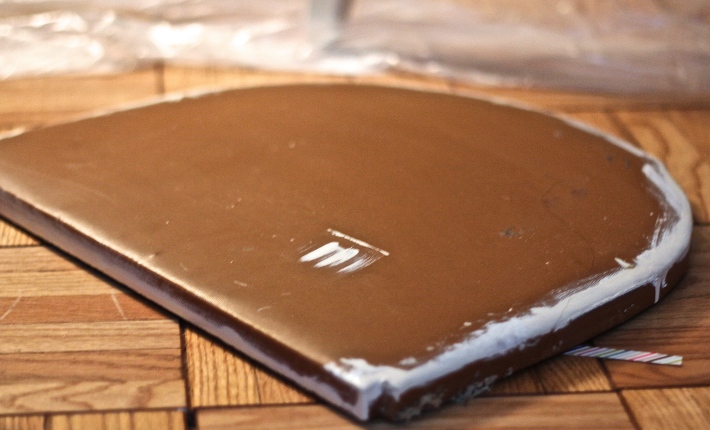
While waiting for that to dry, I turned my attention to the seat bottom itself.  There was no way I was going to put that brown pleather, that I half painted, back on the chair.

Image

My solution was to strip the pleather cover off of the seat cushion and then place it over the seat bottom.  Once I placed the two on top of each other, I used a pair of scissors to trim the cushion down to the size of the seat bottom.  Use glue to stick the two together so that it doesn’t move around later.  Then I used the striped fabric we had purchased from Tru-Mart to cover the whole thing.

Image

I forgot to pack my staple gun when traveling, so here’s my improvised reupholstery techniques.  First, use a quality fabric.  They make upholstery fabric for a reason.  It will cost substantially more but is worth it since the dense material will take the constant wear and tear of daily use.  But if you’re not planning on using it much, then I guess whatever fabric will do. Once you have your fabric, find the correct side, or the side that you want everyone to see. Place that side facing the ground (or another clean, hard surface).  Then place the seat bottom plus cushion on top of that.  Trim the fabric to the shape of the seat bottom but in a larger scale.  You want enough excess fabric to attach to the back of the cushion.  After the fabric is trimmed to size, you want to go ahead and attach the fabric to the seat cushion with nails.  Get the thin one inch nails that don’t have much of a head. The ones that are in small clear hanging packs at The Home Depot.  Use these in lieu of a staple gun.  To do so, you want to hold the fabric tight, then hammer the nail halfway down its entire length.  Once halfway buried, take your hammer and start hammering the nail on its side until the whole thing is flush with the seat bottom surface.  The end result should be a right angle that securely holds the fabric down to the seat bottom.  Use as many nails as you need to to get the fabric to rest taut.  I think I ended up using at least twenty for this project.  I prefer staple guns but this really does work just as well.

Image

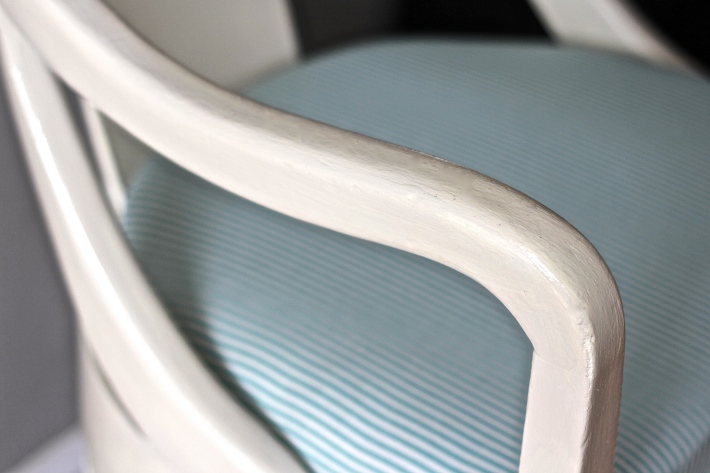
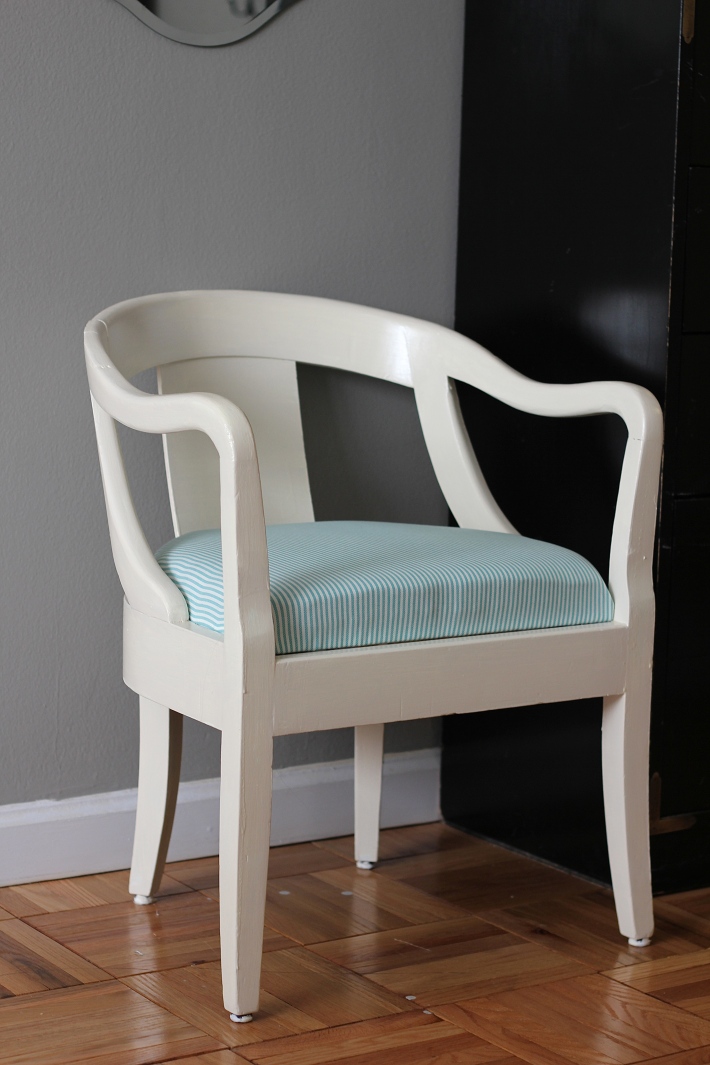
And this is the Dumpster Diving Chair “After”.  The bright turquoise fabric choice gives the chair an updated “fun” look, although I’m not sure how a chair has fun.

Image

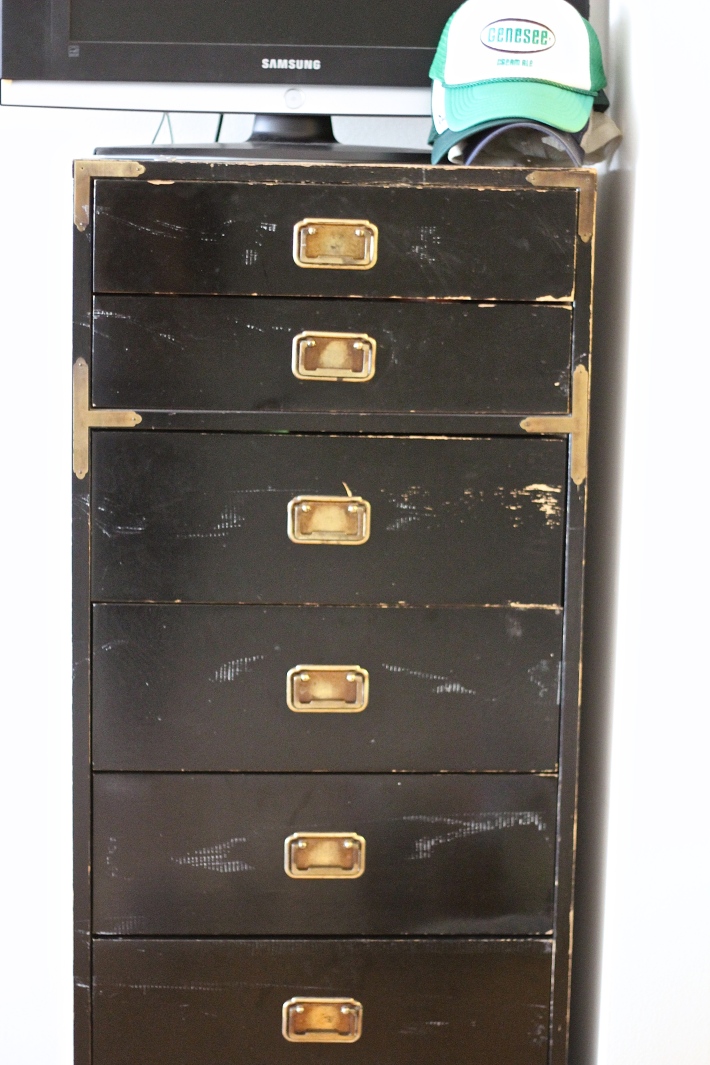
Beside that chair is a black dresser my sister bought years ago for $15, off of Craigslist. The overly gold hardware kind of gives it a Chinese lacquered tea room look that I wasn’t too big of a fan of.  But here is the dresser “Before”.

Image

And here are some scrap pieces of off-white paper that I rounded up.

Image

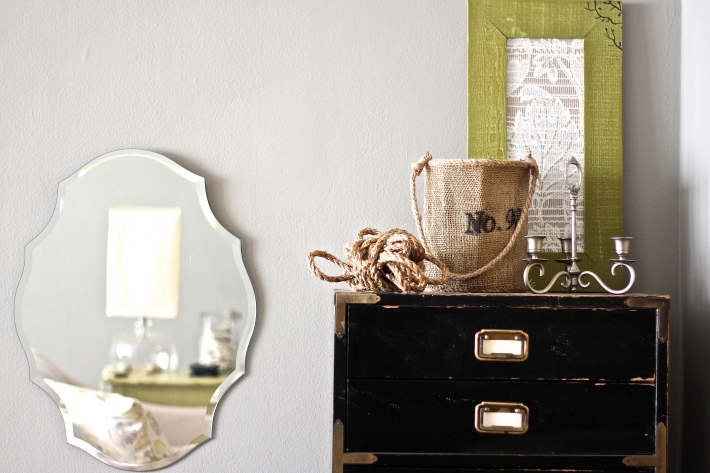
To change the entire look of the dresser, I cut the paper into rectangular pieces measured to the size of the inside of each gold hardware plate.  Then I glued it down.  The end result was more Restoration Hardware vintage dresser versus something out of a Chinatown attic.

Image

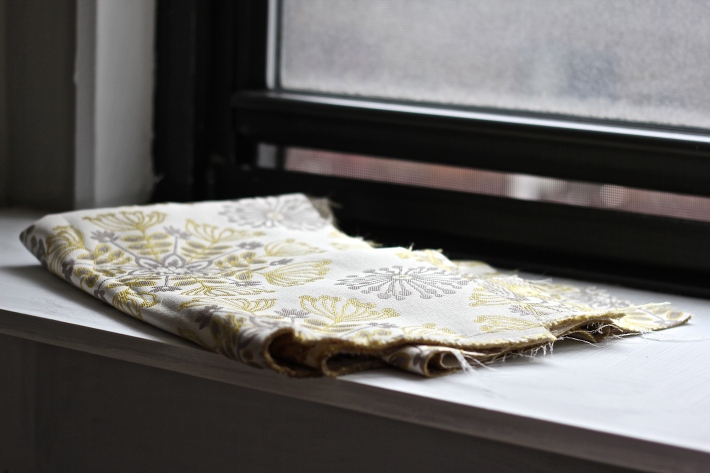
Pillows are pricey.  I have no idea why, since they’re so cheap to make.  So it should come as no surprise that I was spending the night sewing a pillowcase in my pajamas.  Below is the upholstery material I flew in with.  It was leftover from another chair reupholstery project.

Image

I took the fabric and measured it to the exact size of the pillow which was 18×18 inches. Then I cut the fabric out in three pieces, leaving a generous centimeter of extra fabric around the perimeter.

Image

This is a really clean way to sew a pillowcase, with no zipper.  I’ll show you in a later post how to do it exactly, since it’s a bit detailed.  But it’s basically three pieces with the two smaller ones overlapping in the back.

Image

Using a backstitch, I hand sewed the fabric and inserted a pillow my sister already had in her possession to form this.  Here is the pillow “After”.

Image

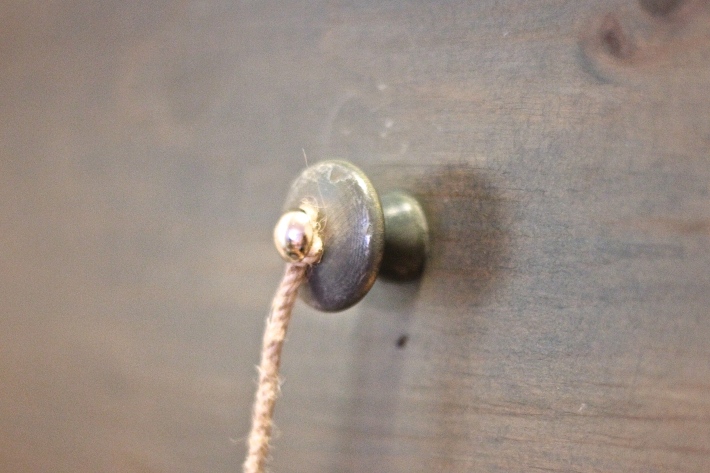
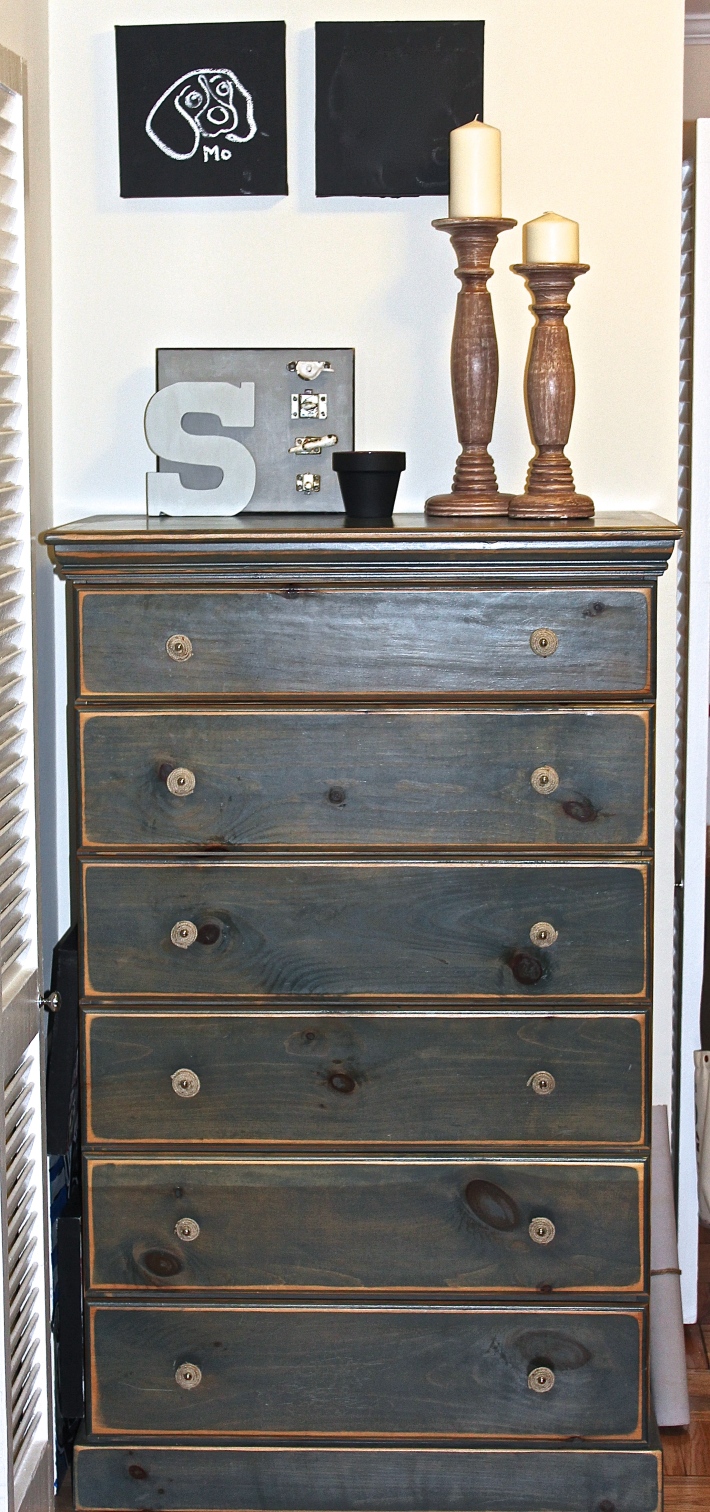
Next, I turned my attention to her green dresser.  I liked the color but was not a big fan of the knobs themselves.  What I wanted to buy were these rope knotted dresser knobs at Anthropologie for $12 each.  With twelve dresser knobs, it seemed a bit frivolous to spend $144 on a dresser’s hardware, so I decided to make my own nautical themed knobs. Here’s what I started off with.

Image

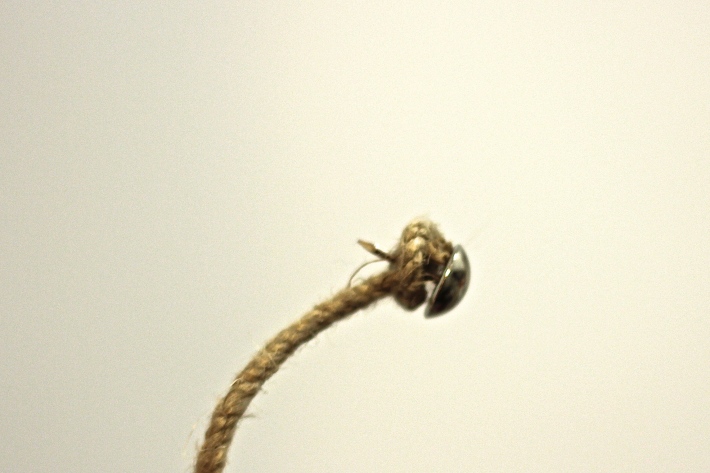
I then took wrapping twine and tied a tight knot into one of the ends, like this.

Image

Then you take an upholstery tack and jab it directly into the middle of the knot.  Trim off the excess rope.  Home Depot sells these tacks in the nails section.

Image

Take that knot and tack contraption and nail it directly into the center of each dresser knob.  This will only work with wooden knobs.

Image

Using E-6000 glue, I dabbed on a generous amount of the stuff to adhere the twine to the wood.  I wrapped it continuously around the tack until I reached the knob’s outer edge. Then I held it in place with a pin.  Take this out when it is completely dry.  I recommend E-6000 since it’s my favorite but you can use any heavy duty glue (like Gorilla Glue) as long as it’s easy to peel off of your hands at the end.  This project can get a bit messy so please don’t use Super Glue.  I haven’t used that stuff ever since it glued together my eyelids…last month.  But here’s the end result.  It cost about $8 to make when Anthropologie knobs would’ve been $144.

Image

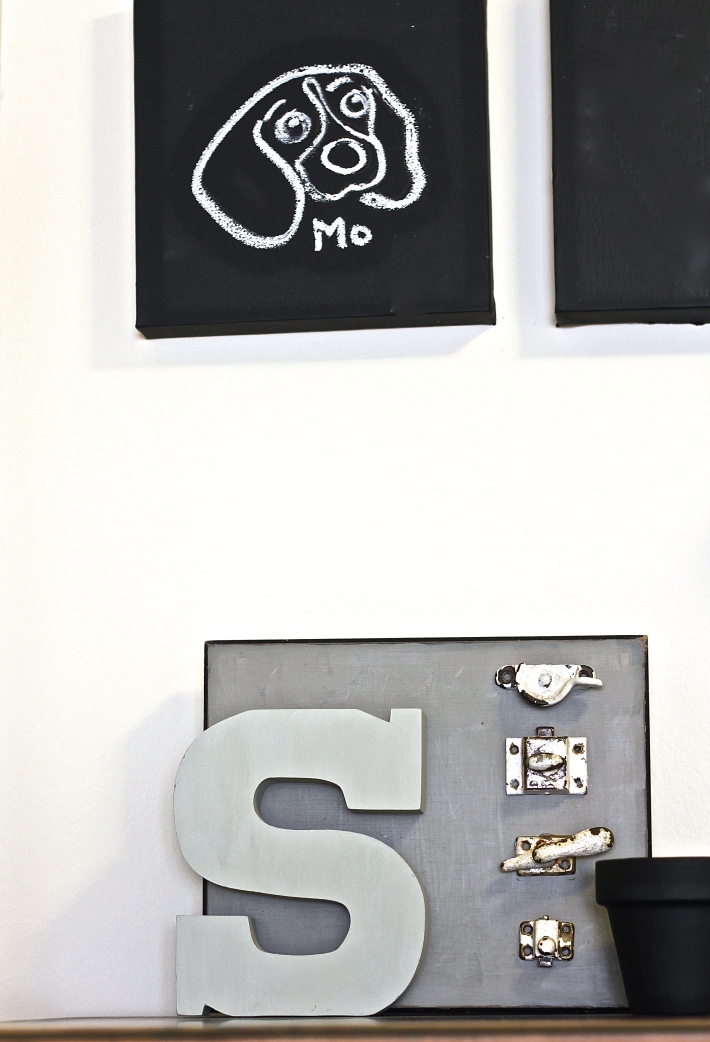
Here’s a close up of some of the things I made on top of the dresser.  The “S” letter thing was made with random stuff I found for cheap at an architectural salvage store in Seattle.  I think some are actually those window clasps you see in old buildings.  The artwork itself was actually canvas she already had.  I covered it with chalkboard paint, let dry and then drew on it with a paint pen.  It’s Mo, the best dog in the world.  According to Mo.

Image

5 Days, $500, 248 sf NYC Apt…Go!: Day 2

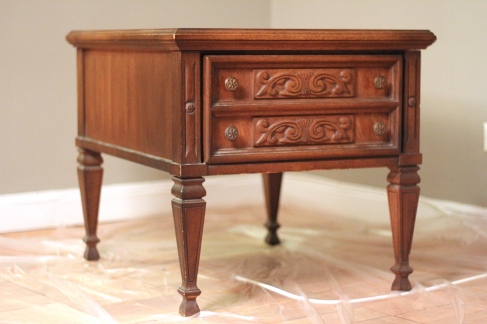
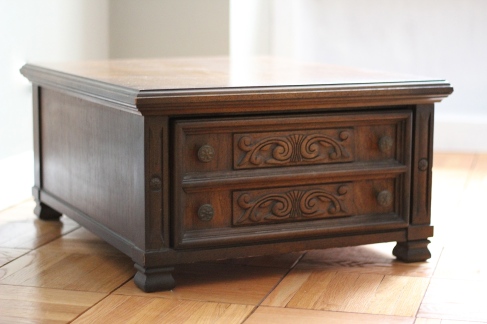
You know you have a thrifting addiction when you find yourself at a NYC street corner, mentally shopping out of homeless person’s shopping cart/home-on-the-go.  In my defense, that woman had a lampshade that, I swear, was a Tiffany original.  I envy. Anyhow, back to the apartment.  After some Pushcart Coffee, my sister and I headed on over to what she refers to as “Thrift Row”.  Goodwill, Salvation Army, Housing Works, Vintage Thrift, they were all there.  I was not like a kid in a candy store.  I was more like a contestant on Supermarket Sweep, trying to stuff a Bonus blow up Hamburger Helper hand into my shopping cart within 60 seconds.  My advice on successful thrifting?  Put away your expensive handbags and engagement rings.  No sane person is willing to haggle down the price of a $50 chair with a woman wearing a $50,000 engagement ring.  I get my best haggling deals using a Trader Joe’s reusable shopping bag as my purse.  But that’s how we got this antique table for $40.  Table was originally $75.  We showed up with Trader Joe’s handbags.  Ten minutes later, we’re carrying a (very heavy) table back to the apartment, with the intention of turning it into a coffee table.  Below is a picture of the coffee table “Before”.

Image

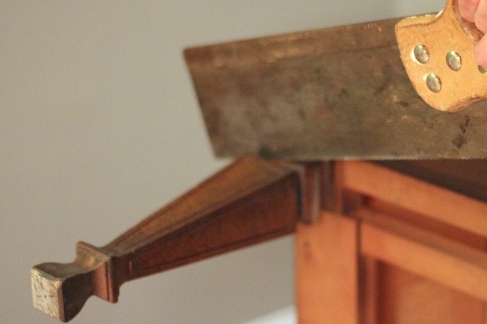
To turn this table into a proper coffee table, I needed to make it not so tall.  I guess “shorter” would be the word.  To remedy this problem, I sought out the help of the superintendent of the building.  I needed a saw.  He had tons.  After asking me roughly ten questions all centered around the key theme of, “You’re not planning on using my saws to hack any bodies, right?” I finally got my hands on a saw.  Then, I went back to the apartment to saw off the legs to my desired height preference.  Legs of the table, that is.

Image

While I was sawing away (it was real wood, so it was super dense and hard), my sister sat on a chair and told me, “I’d help but you have a wedding to look good for, so this is a great way to work out those arms.  You can thank me later”.

Image

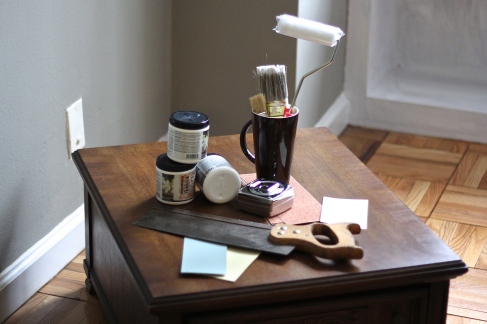
For this coffee table, I envisioned an antique white finish over layers of vintage blue.  To achieve this look, I gathered together all of my supplies which consisted of sandpaper, paint, paintbrushes and rollers.  You want to get the densely packed foam roller for this project.  Much smoother finish.  Oh, make sure you measure the table legs of any table if you’re going to saw it short.  You don’t want to be known as that house with the deck of cards under the leg of the dining room table, cause Mommy/Daddy couldn’t be bothered to measure correctly.

Image

First, I gently sanded the table.  Then I wiped it down with a damp cloth and let it dry.  This didn’t take long.  It’s not long enough for a full martini break.  Just a sip-and-bite-of-olive long break.  For this table, I bought a Behr sample of paint in “River Walk”.  With a paintbrush, I slowly applied very thin layers of blue paint to the entire table, making sure to leave bits of the gorgeous wood carvings to show through for an antique brushed look. You don’t want to load up on paint.  Work in a crosshatch pattern with your brush.  Oh, I forgot.  I took off the hardware before painting.  You should probably do the same.

Image

After I waited for the blue layer to dry (it doesn’t take long since it’s so thin), I used the same painting technique to apply two layers of Behr paint in “Antique White”.  The end effect should have bits of wood and vintage blue popping out between layers of antique white.  To seal it all in, I added a layer of clear polyurethane once the paint was dry.  Get the canister marked “Crystal Clear” or else you end up with the nasty yellow tinged “Clear” kind.

Image

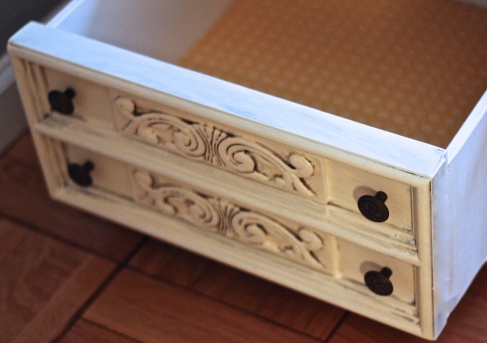
To finish off the table, I re-added the carved brass hardware and lined the inside of the drawer with leftover scrapbook paper.

Image

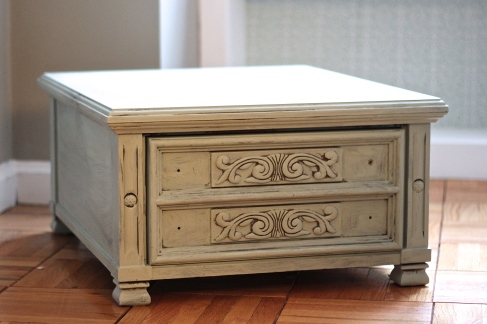
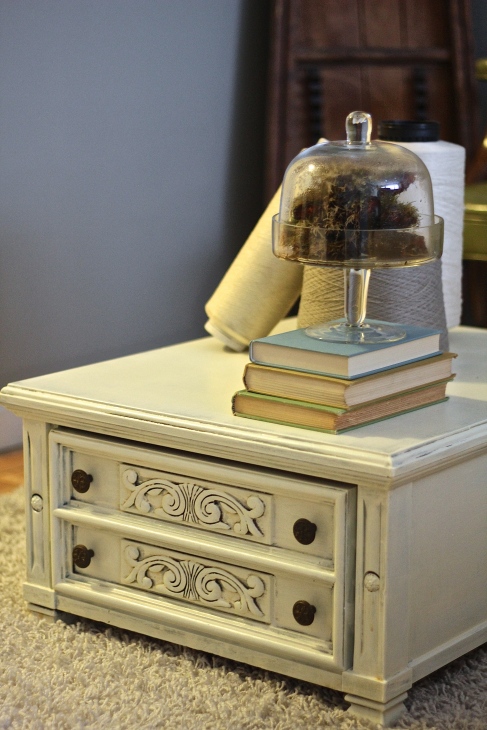
Coffee table “After”.

Image

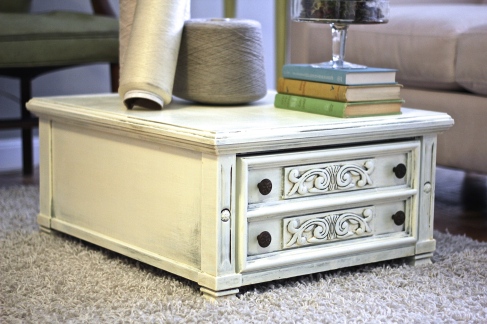
Same table, different view.

Image

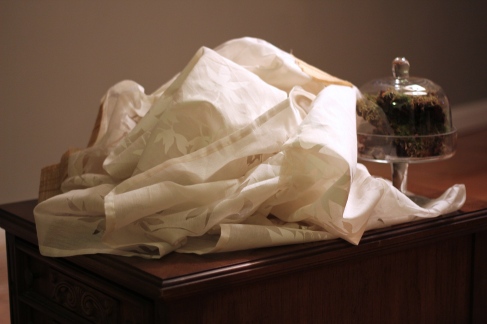
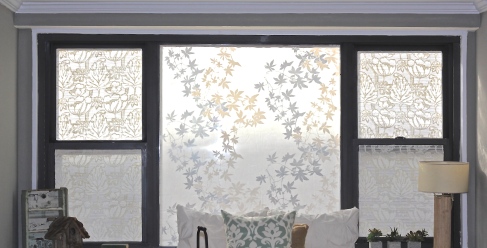
Once I was done with the coffee table, I turned to the issue of providing privacy for the space.  I didn’t want to do long curtains since the bookcases sat directly below it and would’ve been covered by any long fabric.  Short curtains were out of the question as well since I think they look tacky.  Roman shades were also an option, but I chose to do a faux etched glass look for this room’s windows instead.  This window effect provides an opaque lacy look that allows plenty of light in but leaves the curious eyes of neighbors (across the courtyard) out.  The best part is that the window treatment can be undone upon move out with a wet sponge and some patience.  To create a faux etched glass look, I needed starch as well as sheer fabric.  Luckily, I packed panels of such fabric in my luggage.  This one was purchased from an Austin Goodwill years ago for $1.99.

Image

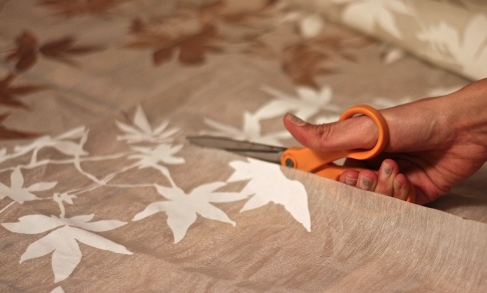
After giving the windows a thorough wipe down, I measured the glass area I wanted to cover.  Then I cut the fabric accordingly.

Image

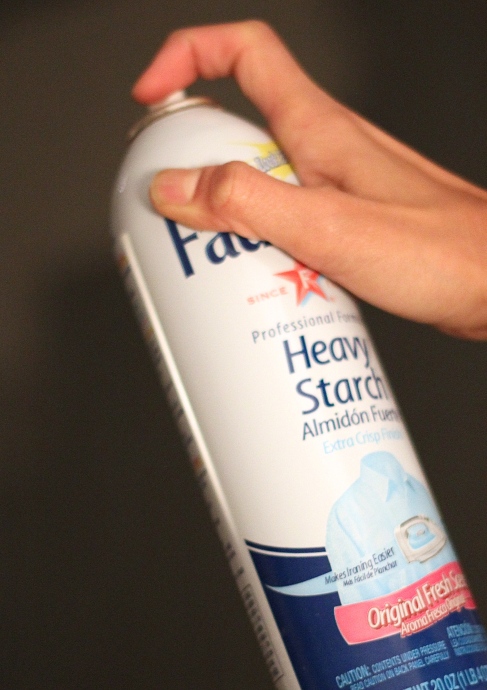
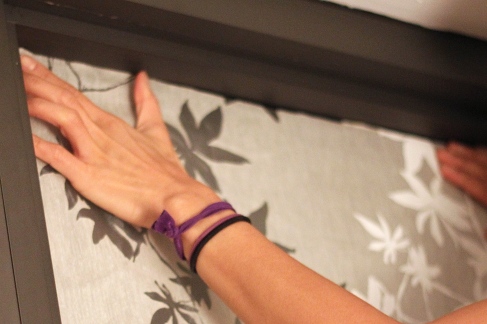
For this fabric, since it’s light, I was able to put it up with heavy starch spray.  Just spray the window, then spray the side of the fabric that’ll touch the window and press down. Spray as much as you need to.  You may want to lay down a towel over any area directly under this.  It gets a bit drippy.

Image

Smooth out the air bubbles with your hands.  If you have a straight edge or squeegee, this will be a good time to make use of those.

Image

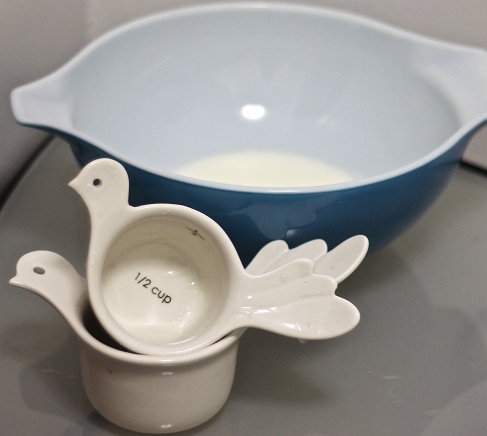
Since the spray can version of starch only works for the lighter fabrics, I had to find a different solution for the heavier lace material I wanted to use for the side windows.  So, I made my own starch.  To make this, you’ll need to dissolve 1/4 cup of starch in 1/2 a cup of cold water.  Stir it around a bit until the starch dissolves.  Then I boiled 4 cups of water in a pot and slowly added the starch mixture once it was hot enough.  Keep stirring until the starch is broken down and the mixture is slightly opaque.  Once this happens, turn off the heat and let cool.  Using a brush, apply the cooled off starch mixture to the window. Soak the heavy fabric in the starch mixture and apply the heavy fabric in the same manner as the lighter one.

Image

We bought the lovely lace on the side windows after searching for “un-trashy” lace for two days.  After checking out several fabric stores, we ended up at a corner store called Tru-Mart.  The service was horrible, the 10×20 ft store resembled a fabric hoarder’s paradise with nowhere to walk (or run away) but hey, the price was right.  We ended up getting two yards of this lace, two yards of burlap and three yards of striped linen for $23.  When you’re dealing with wet fabric, it tends to stretch a bit so you may end up having to cut away some of the excess fabric off the sides of the window.  Wait until it’s dry though.  But this is the window area “After” during daylight hours.

Image

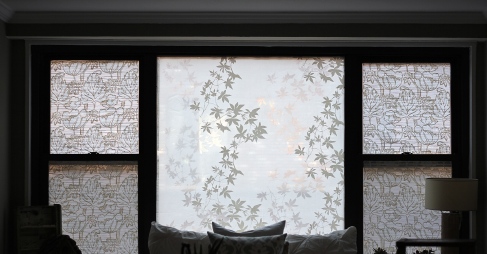
And this is the window area “After” after sunset.

Image

Doo-doing The Bathroom, Hallways & Patio

The bathroom.  People spend a lot of time in here alone.  You, your guests…the maintenance man who’s there to unclog your drain, and tell you that you need to cut your hair short so that he doesn’t have to unclog so often.  I mentally fired him but it hasn’t happened in real life yet.  I’ll let you know when it transpires.  But with the sort of friends and family I have, I know they’ll be snooping through my bathroom cabinets unsupervised, so I’ve developed a guideline on How To Impress Your Guest While They’re Peeing.  You might want to bookmark this.  You won’t learn this sort of stuff from Martha Stewart.

How To Impress Your Guest While They’re Peeing

  1. Your toilet paper choice is a direct reflection of your income and social standing.  Choose wisely.
    1. Seventh Generation: This is the recycled toilet paper of choice for hipsters/hippies who pray at the alter of Whole Foods.  My fiancé used to use this brand until I pointed out that their toilet paper division is based on the phrase, “There’s softer bathroom tissue out there, but ours does more”.  If you buy this brand, you’re going to have to keep the wrapper on the rolls so that your guests know that you are an Earthlover with disposable income.  Without the wrapper, I’m afraid your guests will assume that you stole toilet paper from the airport because in all honesty, there is no difference between the two.
    2. Quilted Northern Ultra Plush:  This toilet paper says the buyer is a person with a substantial savings account and marinated gourmet olives in the fridge. Nothing impresses a guest more than the quilted look.  You have arrived my friend, congratulations.
    3. Singly-ply tissue:  Quickest way to not have any return houseguests.  No one wants to have poor friends with debt issues.
2.  Choose your magazines and newspapers wisely.  I subscribe to The New York Times just so that my guests can think I’m educated, worldly and can’t finish the Saturday crossword puzzle.
3.  Hide your makeup unless you want your $43 Laura Mercier foundation to be half empty, and your Maybelline $2 lipgloss undisturbed but the subject of a text sent from your guest to a mutual friend that goes “I can’t believe she uses grocery store makeup…ew”.
4.  You may want to do a little pruning of your medicine cabinet. You lose friends with herpes medication, you gain friends with some manic pills.  Those people are fun.  Half of the time.
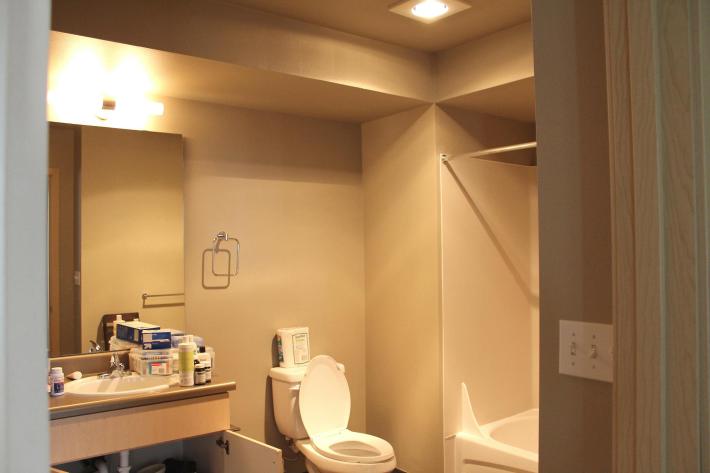
5.  Finally, keep your bathroom clean.  Seriously.  Clean it.  You’ll keep more friends that way.  Trust me.  Here’s the “Before” picture.
Image

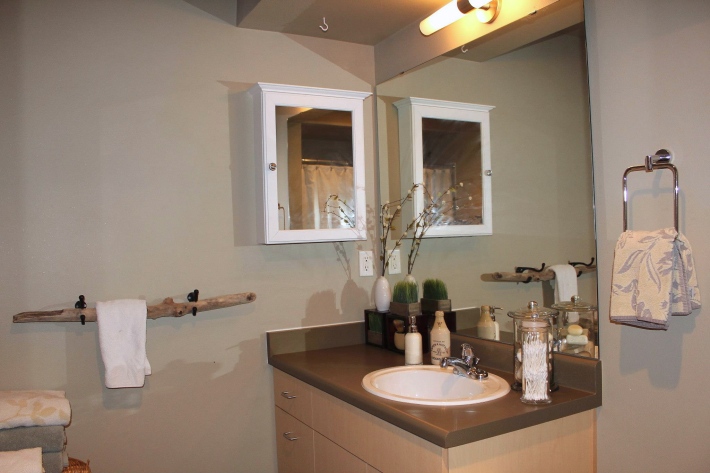
Bathroom “After”. I added the medicine cabinet to provide extra storage. The towel rack on the left is actually a piece of driftwood I took from Discovery Park. Apothecary jars are used as storage for bar soaps and supplies. I also have an antique shaving kit and English dairy bottle on the counter if you look closely enough.

Cost:

Medicine cabinet: $89 (Home Depot, my second favorite store after Goodwill)
Apothecary jars: $8 for 2 (Austin Goodwill)
English dairy jar: $8 (Butler’s Antiques in Fort Worth, TX)
Shaving kit: $Free.99 (Fiance’s mom’s storage unit)
Image

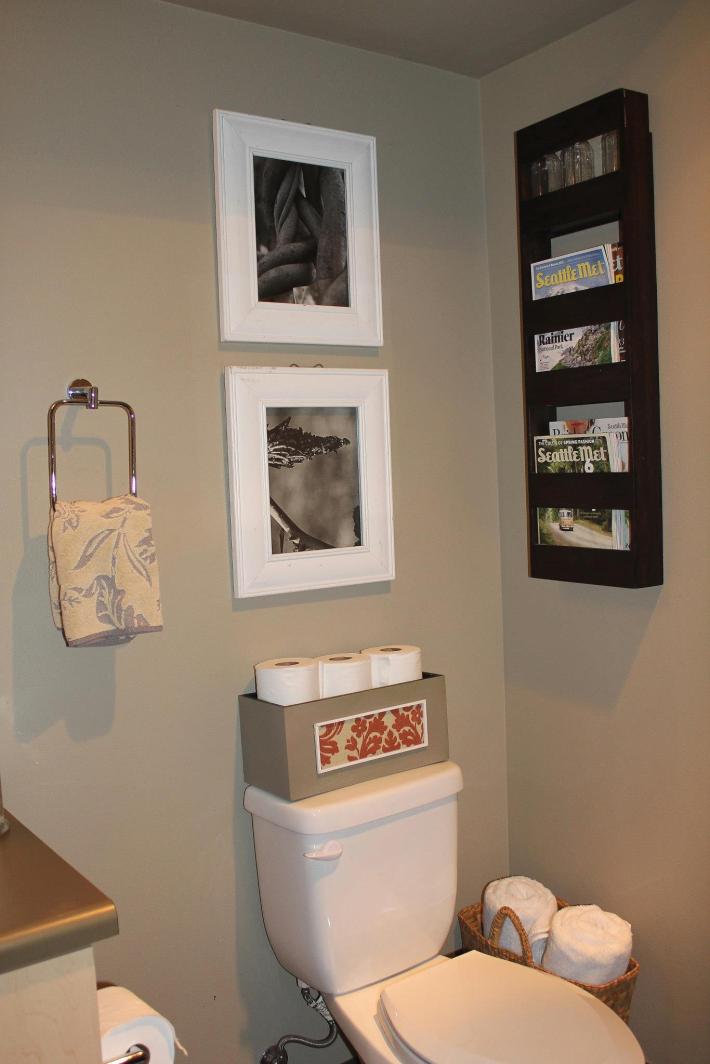
Bathroom “After”. I made a toilet paper holder by buying a plain wooden box from a craft store, painting it grey and attaching fabric and frame to the front. The photos up top are ones I’ve collected over the years from garage sales and thrift stores. The magazine rack was bought at a Goodwill in Austin.

Cost:

Wooden craft box: $5 (Michael’s, buy and stock up when they’re 50% off)
Magazine rack: $6 (Austin Goodwill)
Photos: 99 cents apiece (Austin Goodwill)
Frames: $4 apiece (Austin garage sales)
Image

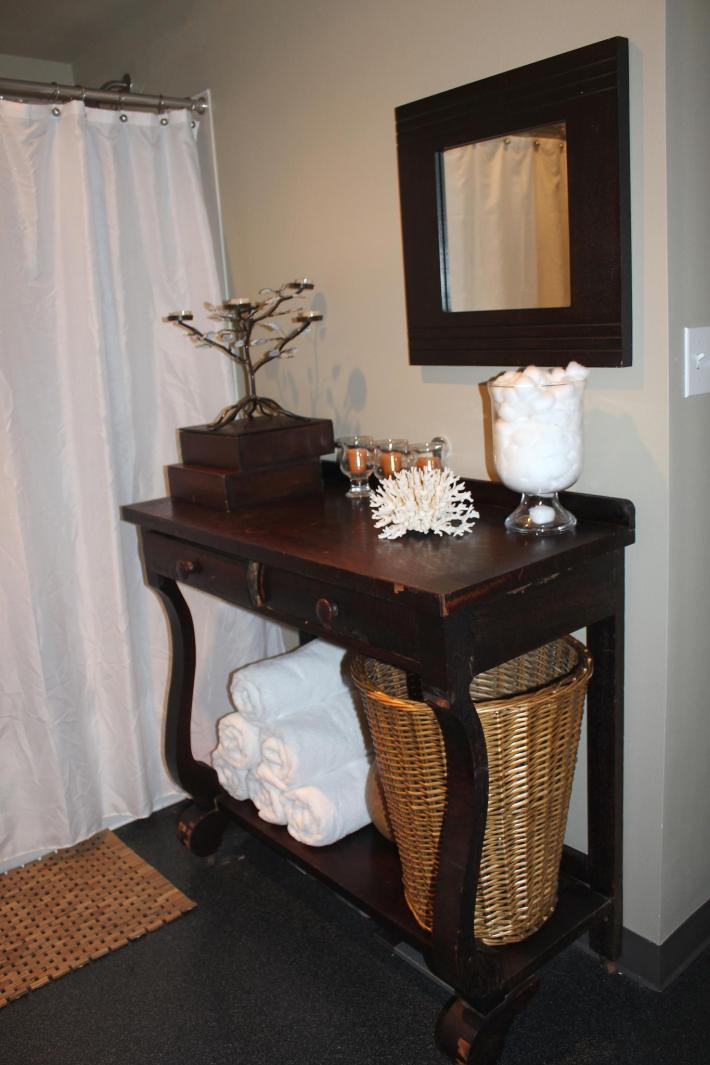
Bathroom “After”. One of my favorite pieces, this side table was a wedding gift to my fiance’s great great grandmother. It requires weekly applications of lemon oil since it’s fairly fragile due to years of neglect but it works well as a towel and hamper storage for the bathroom.

Cost:  Free

Image

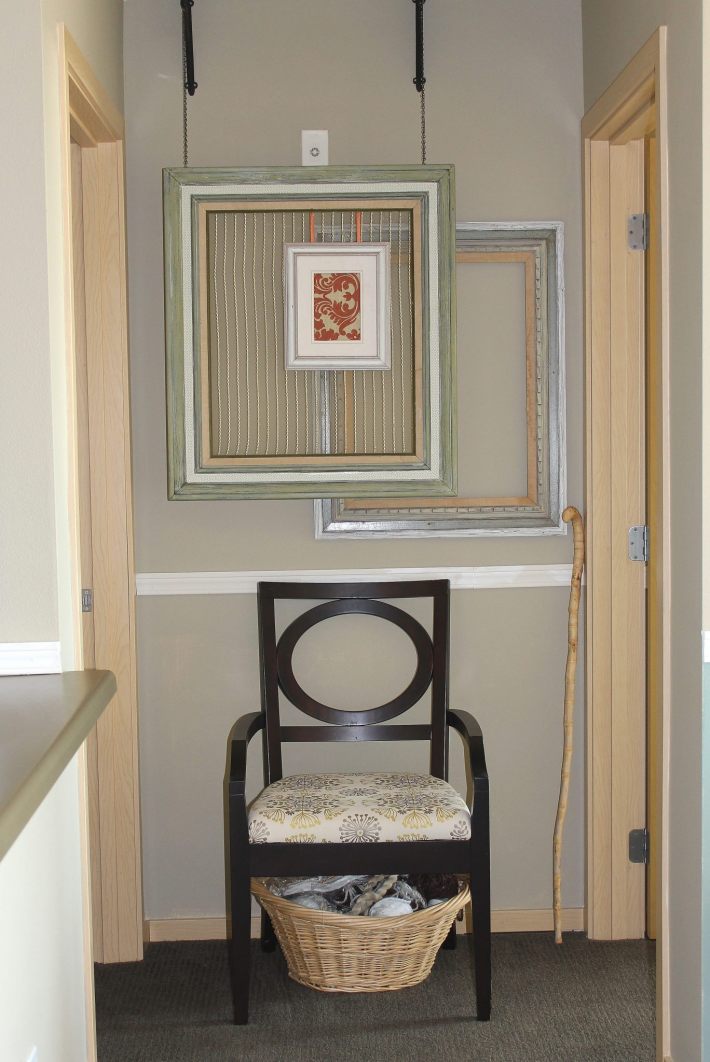
Bedroom Hallway “After”. The chair was purchased from Goodwill at $12.99 and reupholstered with a yellow/grey starburst pattern. I found these old frames at flea markets, repainted them and added scrap bits of wallpaper to the border and then hung them up. The front one is off iron hooks from the ceiling and has sheer fabric attached to the back. The walking stick to the right was handmade in Cambodia. The basket underneath is full of yarn…so this is really my knitting area complete with the old person’s walking stick.

Cost:

Chair: $12.99 (Austin Goodwill)
3 Frames: $17 (Flea market in Fort Worth, TX)
Image

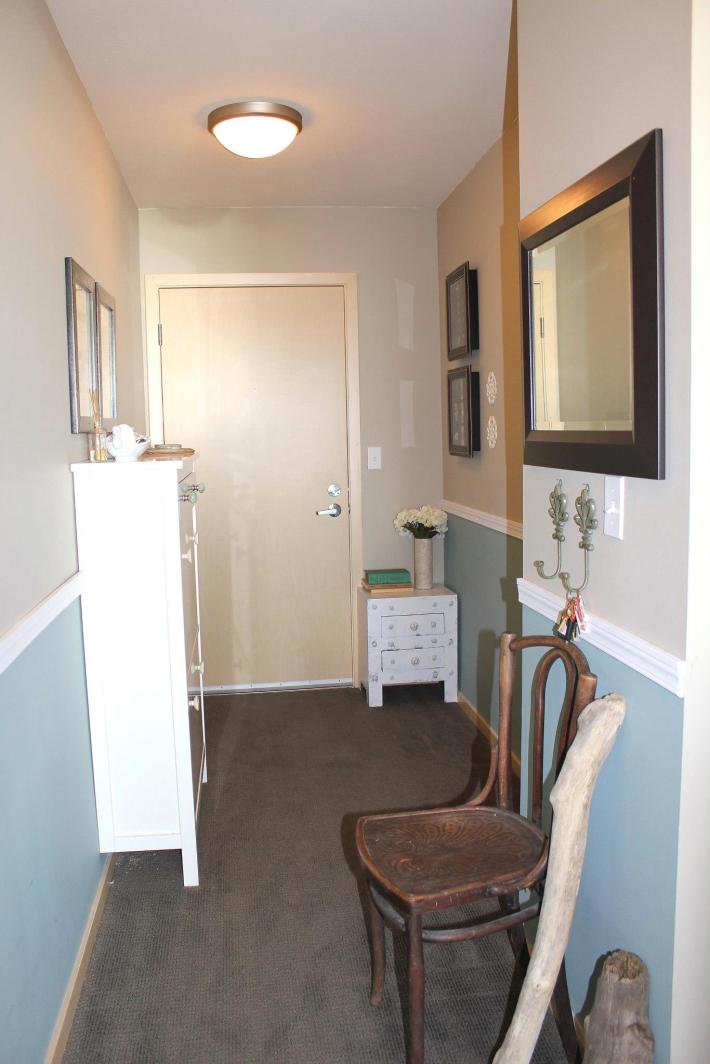
Hallway “After”. Not much going on here since I like to keep the entryway clutter-free but to the left is a shoe cupboard I’ve outfitted with interesting knobs. To the right is a handcarved chair I found for $8 that dates back to the 1940’s.

Cost:

Ikea shoe cupboard: $150
Dresser knobs: 6 at $8 apiece (Anthropologie)
Chair: $8 (Austin garage sale)
Image
Patio “Before”. This is the smallest patio I’ve ever seen but also one of the fewest ones seen in Seattle. Most places here don’t have a patio. People go sit in the woods, with their tops off, singing campfire songs when they want to sit outside.  Oh, that’s my dog, Mo. She goes topless all of the time.
Image

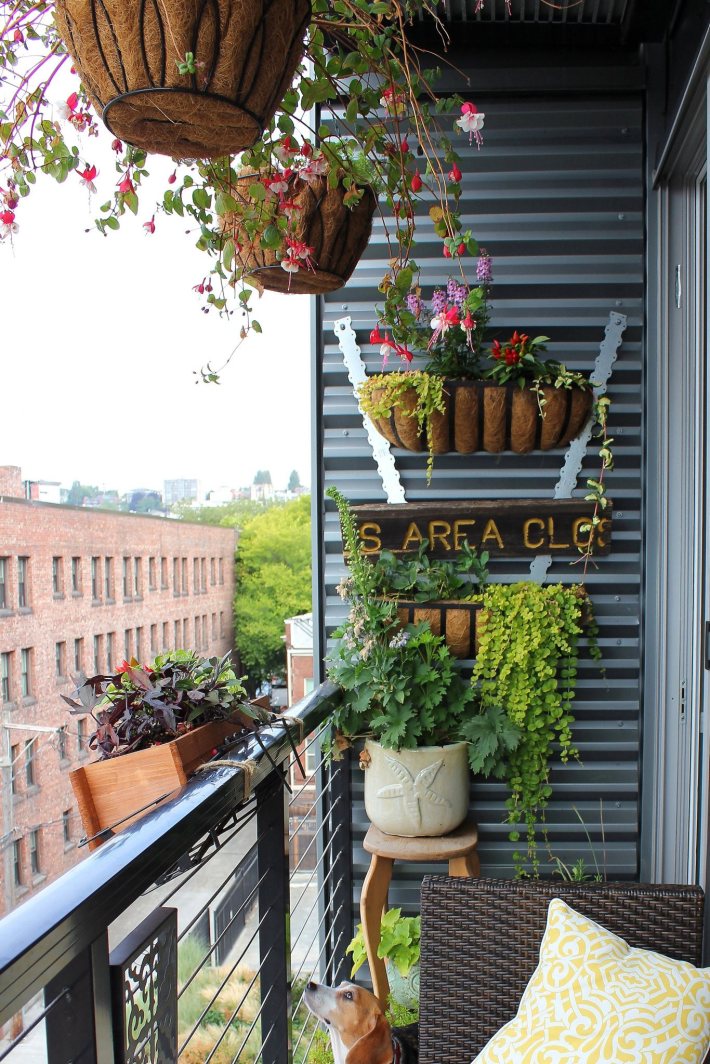
Patio “After”. I’ve planted fuchsia (correct spelling, I swear), sweet potatoes, strawberries, peppers, basil, lemongrass, rosemary, foxgloves, maidenhair, lavender, hydrangeas, delphiniums, sage…the tricky part was mounting the planters to a solid metal wall. My fiance figured out how using those metal bars and some brain power. The sign between the planters was taken from Colorado State Park during our first camping trip.

Cost:

All plants: $75 (Home Depot, Ravenna Gardens)
Planters: $80 (Home Depot and Seattle Goodwill)
Soil: $12
Outdoor seating: $300 (Pier 1 Imports)
Outdoor pillows: $21 (30% off at Pier 1 Imports)
Image
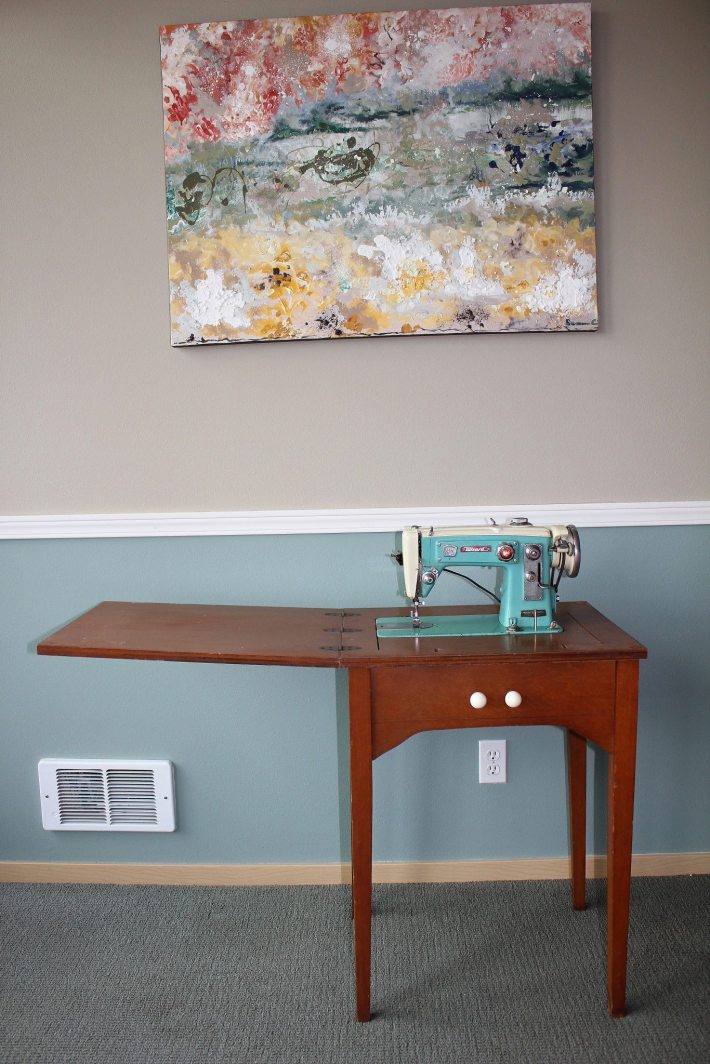
This is a vintage sewing table that no longer works.
Image
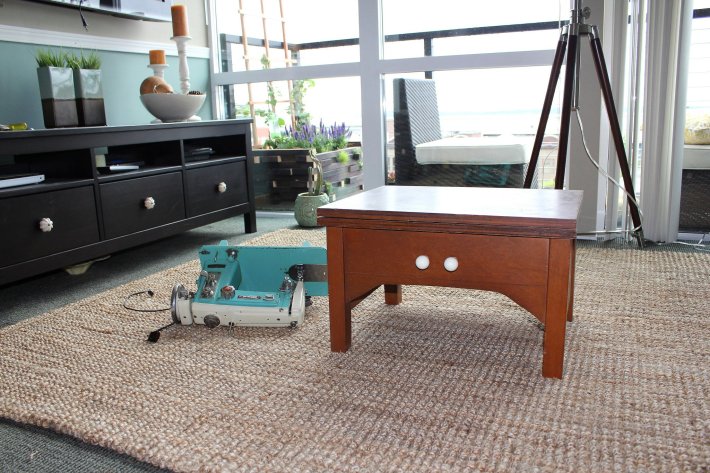
I unscrewed the machine from the table and hacked off the bottoms…
Image

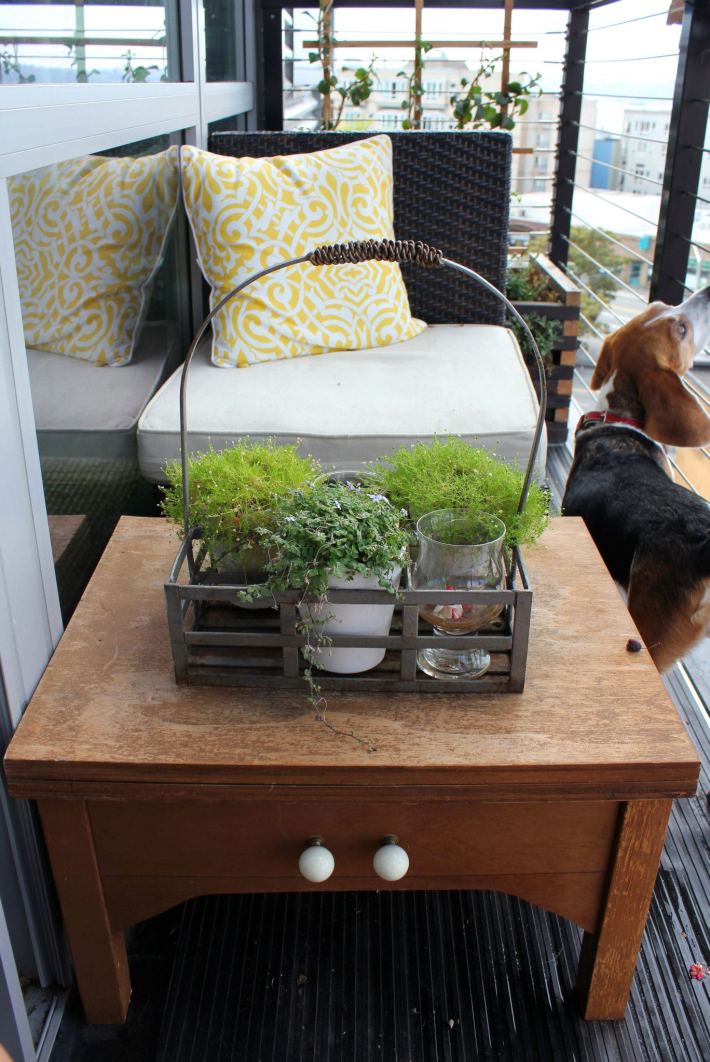
…to make an outdoor table/cooler (since the top opens up). The milk rack on top is an antique one I bought from Goodwill for $1.99. I used it to display some mossy plants. You can’t really see but behind the chair is a planter that I made from upending a coffee table that I made when I was 17, lining the inside with coffee burlap bags and filling with soil and plants. You can see a better picture of it in the photo right before this one. It’s in the far left corner.

Cost:

Sewing table: Free (Given)
Milk rack: $1.99 (Austin Goodwill)
Mossy plants: $8 (Home Depot)
Dog: Not Free
Total Cost: $859.96 for all three areas.
Image

I Craft In My Pants: Living Room

Say that title really fast, it’s funnier that way, I swear.  And welcome to my home!  Feel free to look around and pass silent judgement.
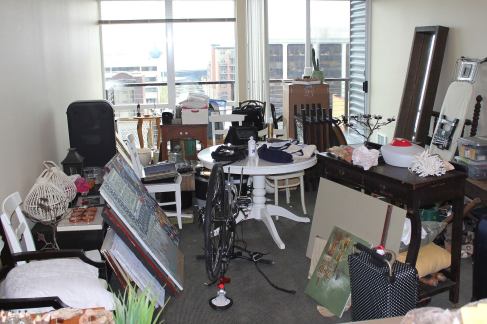
Living Room “Before”. If you ever wonder what $11,000 will get you, this could be it. For that amount, movers packed, shipped and unpacked for us but you can’t stop them from making you look like a crazy hoarder when they’re done. Thanks Graeble Relocators.

Image

Living Room “During” Picture. Since I was working within a tight space of 820 sf, I had to shuffle things around to paint and add chair rails. 820 sf is a luxury in Seattle. We were shown 585 sf apartments that people actually live in. To you and I, that’s like living in a walk-in closet for midgets.

Cost:

Chair rails: $80

Behr Paint & Primer in “Pebble Stone”, matte finish: $25

Image

Living Room “During” Picture. The original walls were a hideous peach color that shouldn’t be happening anywhere outside of a summertime peach sorbet. It took me about five trips to Home Depot to find the right shade of grey since, with such an open and brightly lit space, the colors always seem more washed out once I put it on the walls. I painted the space under the chair rails a pretty blue to add some color to the space.

Cost:

Glidden Paint & Primer in Arrowroot, matte finish: $12

Image

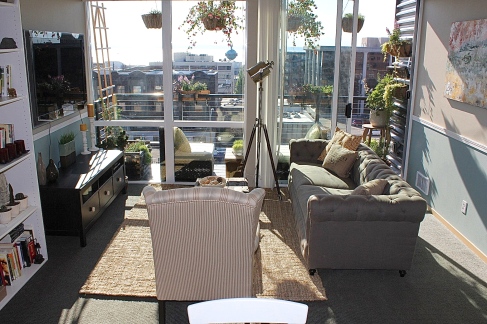
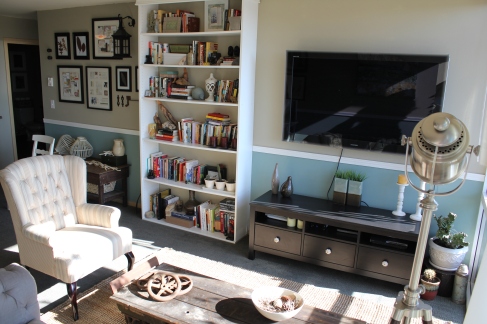
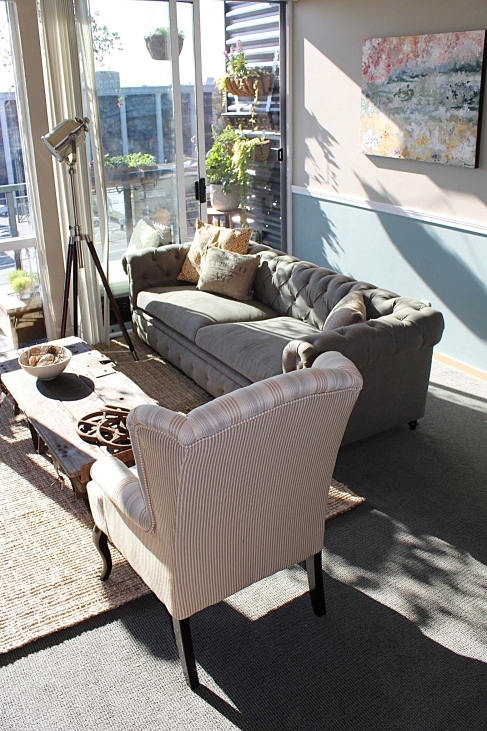
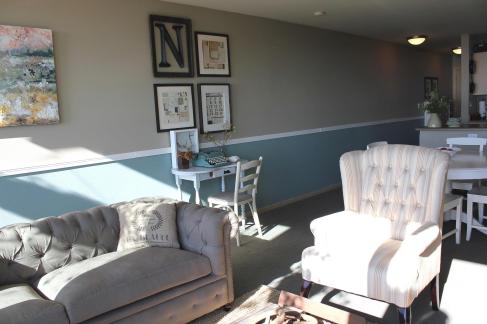
Living Room “After”. Since the space is an open floor plan, I had to separate the dining area from the living area somehow. I did this by building my own floor to ceiling bookcase (to the left) and using a jute rug to form a seating area. The grey sofa I bought for half off of Anthropologie online and also got the $300 shipping fee waived once I started throwing some legal jargon at them. The floor lamp is from Pottery Barn. Tell them you just moved and they will give you 10% off of your purchase.

Cost:

Ikea jute rug: $89

Anthropologie sofa: $2,100 (Half off, $300 delivery fee waived)

Pottery Barn floor lamp: $377 (10% move-in discount)

Image

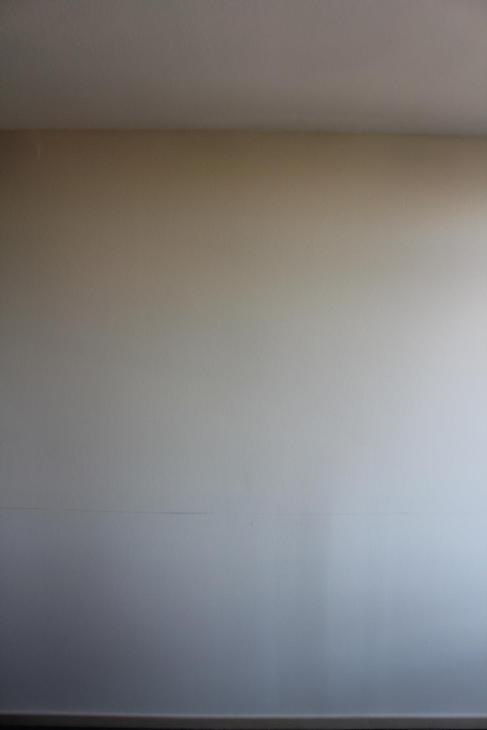
Bookcase “Before”. This was the empty blah wall before I built my bookcase.

Image

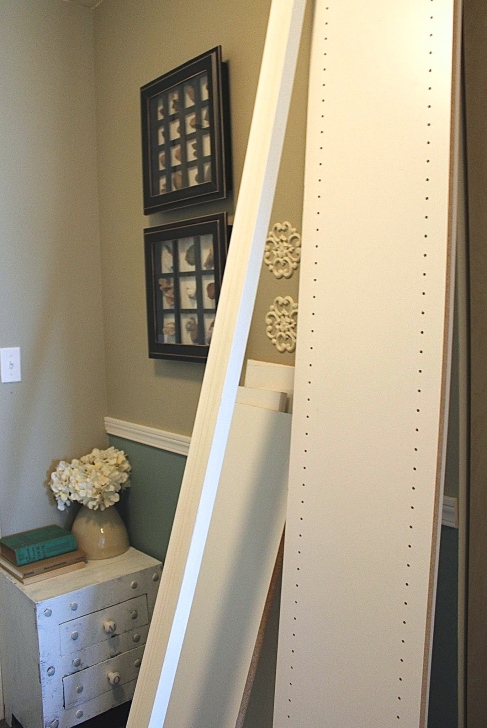
I bought shelving wood as well as thick molding to make my bookcase. This is in the entryway which I decorated with vintage books, shadowboxes with rocks that we’ve collected over the years from our travels and a side table that was 80% off but all kinds of ugly…so I repainted it in a distressed style and added cute knobs.

Cost:

Hobby Lobby dresser: $22 (80% off original price)

2 Hobby Lobby dresser knobs: $6 (Shop when their hardware is 50% off)

Shadowboxes from Michael’s: $30 for both (Was in the clearance bin for half off)

Image

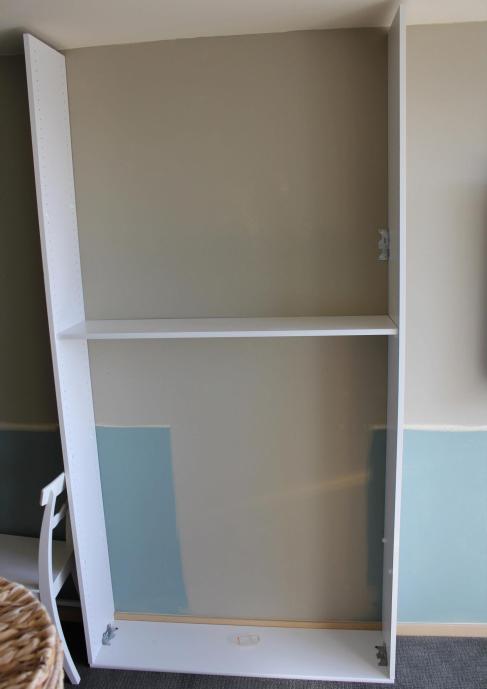
Bookcase “During” Picture. This is not as easy as it looks. I almost wanted to quit and buy a standard bookcase even though I knew that the uncustomness of it all would drive me nuts over the years.

Image

Bookcase “After” Picture. You can’t really tell from this angle but I added thick crown molding to the very top of the bookcase to make it look fancier…as well as add $30 to the bookcase’s final cost tally. The books about C++ and Theoretical Physics are my fiance’s. The interesting ones are mines.

Cost:

Bookcase material: $120

Image

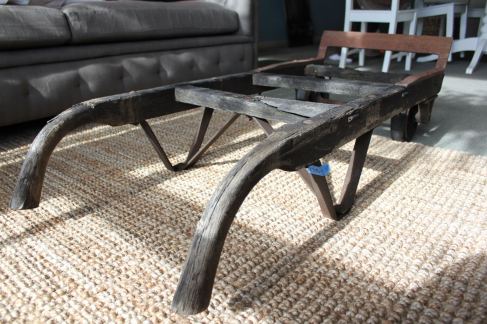
Coffee table “Before”. This is a vintage hand cart I bought at an architectural salvage store. It was originally priced at $125 but I haggled the price down to $75.

Image

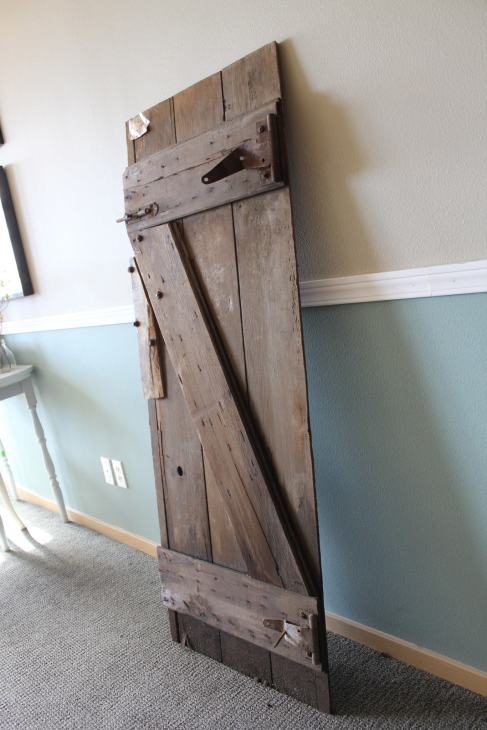
Coffee table “Before”. This old barn door is what I used for the top of the coffee table. The asking price at the architectural salvage store was $100 but I got it for $75.

Image

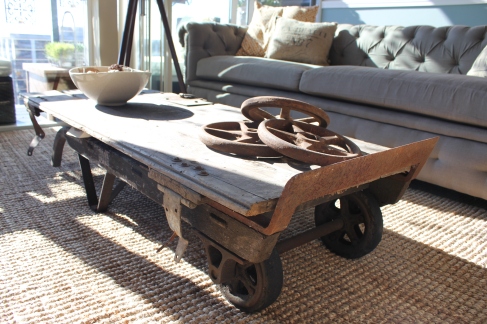
Coffee table “After”. This coffee table was made after looking for the perfect piece for three months. I actually ordered a coffee table from West Elm in a moment of weakness but it was on backorder til September so that’s how I ended up making this. The three pulleys on the table were purchased at a fruit stand/antique store in Thorp, Washington during one of our roadtrips.

Cost:

Coffee table: $150 (Earthwise Architectural Salvage Store in Seattle, haggle with them)

Antique pulleys: $24 for 3 (Thorp Fruit & Antique Stand)

Image

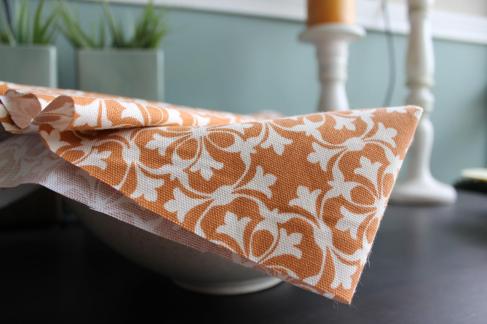
I think I drove my fiancé insane with my hunt for the right colored fabric to make the sofa’s throw pillows. I’m pretty sure he was at wit’s end cause he basically insisted on buying $125 pillows just so that I can shut up about fabric choice and correct pillow density. I told him no (the color was too coral and not burnt orangey enough) and instead, I found this great fabric (in the color I was searching for) at $2 a yard. I got this amazing deal because it was a discontinued style, end of bolt and the cashier had the mathematical capacity of a wig on a hat rack.

Image

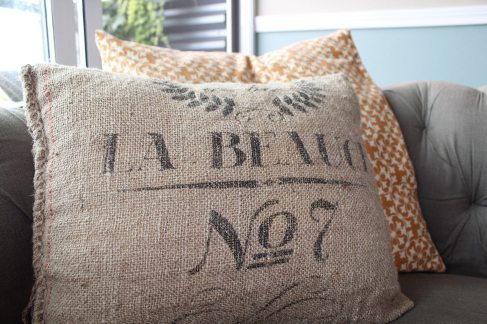
Pillows “After”. I also wanted to buy these amazing grain sack throw pillows from Restoration Hardware but I couldn’t justify spending more on a pillow than I do for a whale watching ship ride, so I made them myself using grain sacks I bought at $5 a pop.

Cost:

Orange pillow: $2 ( I used Jo-Ann Fabric material and existing pillow)

2 Grain Sack Pillows: $10 (I used two sacks purchased off Amazon.com and existing pillows)

Image

Living Room “After”. I painted the painting to the right during a particularly creative mood.

Cost:

Blank canvas: $35 (50% off, I stock up when they have canvas sales)

Image

Living Room “After”. Since the dog isn’t allowed on the sofa, we got a wingback chair that she could drool and shed all over. This wingback is one of my greatest finds. I initially wanted one that was upholstered in a ticked linen but at $900, it was too much for what would be a glorified dog chair. I found this exact one, just in a different fabric, for $150.

Cost:

Wingback Chair: $150 (Pier 1 Imports.  50% off original price and additional discount since it was a floor model)

Image

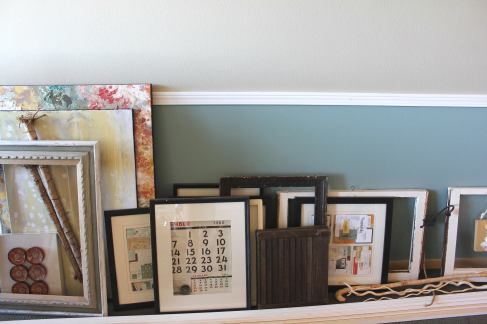
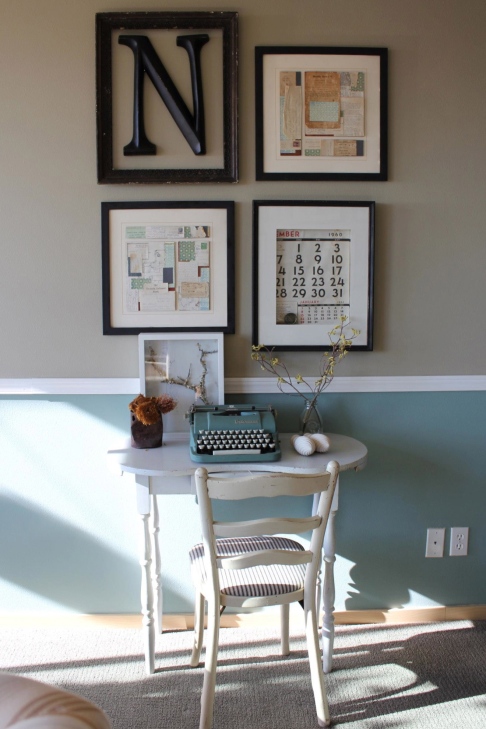
Desk Area “After”. This is basically the same set up I had in Austin but just to refresh everyone’s memory, it’s a chair from 1943 that I bought at a thrift store for $6.99. The desk was from a flea market that was bought for $10. The typewriter was $20 and found in an antique shop during my roadtrip through New England. The shadowbox holds a branch full of lichen from Town Lake in Austin. The frames up top are composed of a calender from 1960, report cards from 1922, postcards dated back to the Great Depression and written in Czech (all from my fiance’s family). The frame to the top left is actually an antique one that has been in my fiance’s family since the early 1900’s.

Cost:

1943 Chair: $6.99 (Austin Goodwill)

Desk: $10 (Fort Worth flea market)

Typewriter: $20 (New Hampshire antique store)

Image

Total Cost: $3,268.99